
Purpose
This SOP describes how to create a booking page in Zoom Scheduler, allowing others to book meetings with you through a shareable link.
Scope
This procedure is intended for all Zoom users who want to set up a scheduling page for one-on-one or team meetings. Follow this SOP when creating a new booking page for the first time or adding additional booking options.
Prerequisites
An active Zoom account
Logged in to zoom.us
Basic or higher Zoom plan (note: free plans are limited to 1 active booking page)
Procedure
- Step 1 of 6
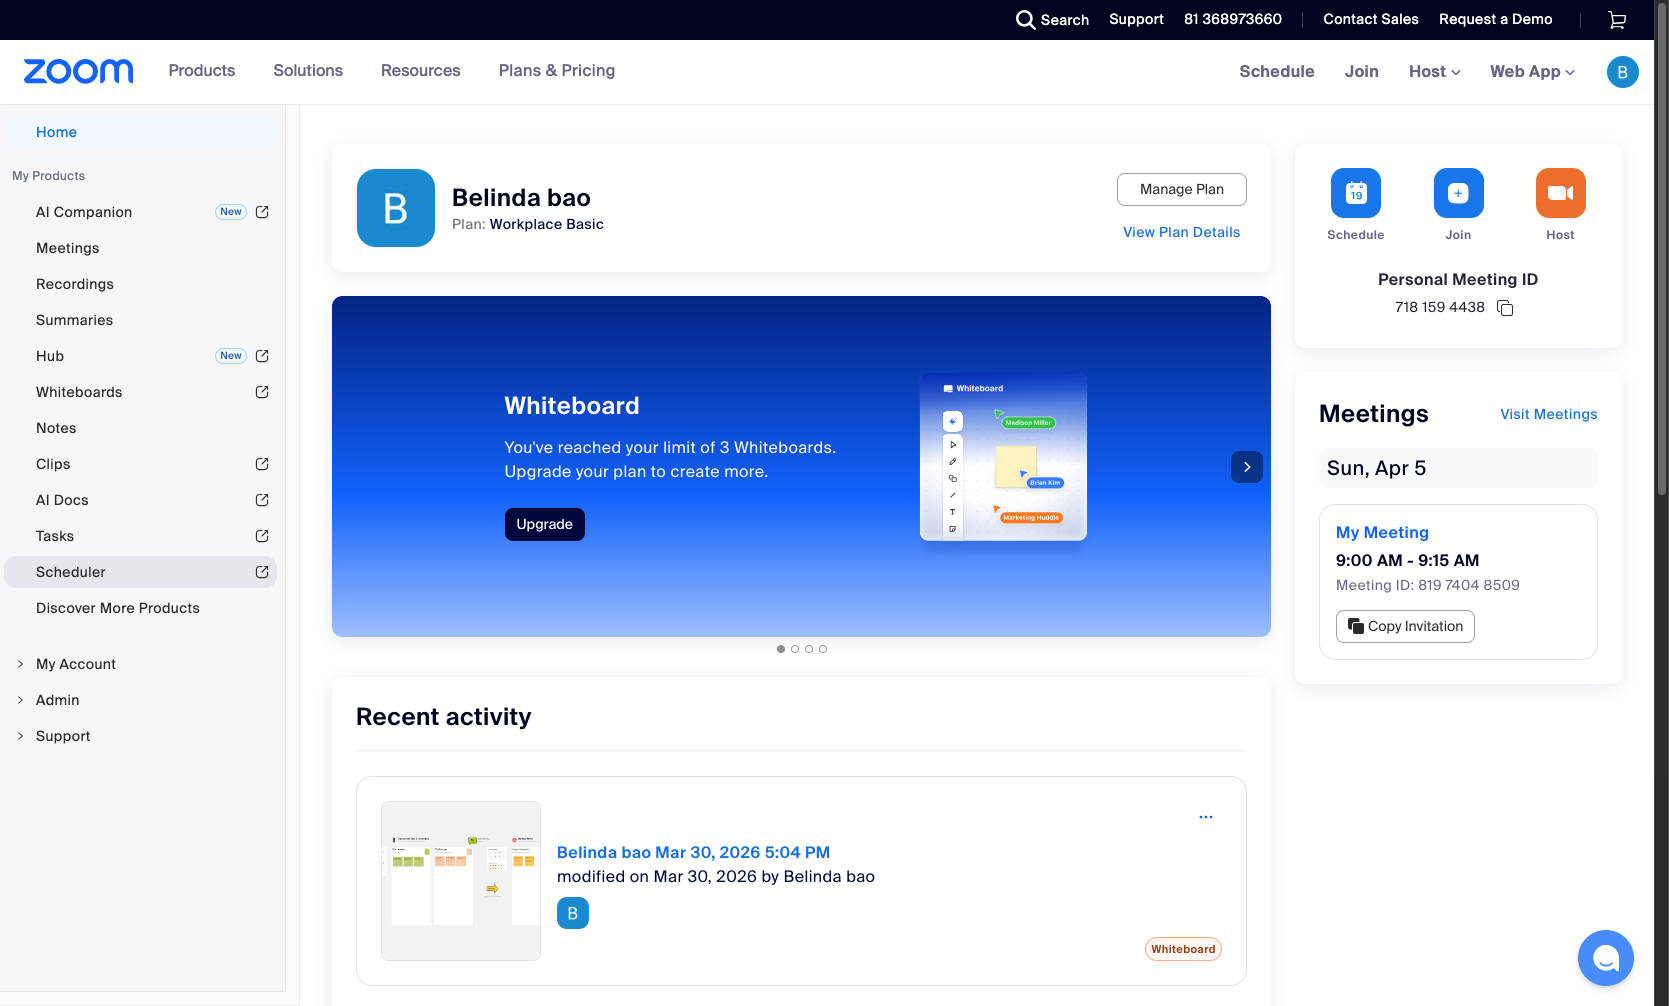
Navigate to zoom.us
Log in to your Zoom account
Navigate to zoom.us/myhome and sign in with your Zoom credentials.
- Step 2 of 6
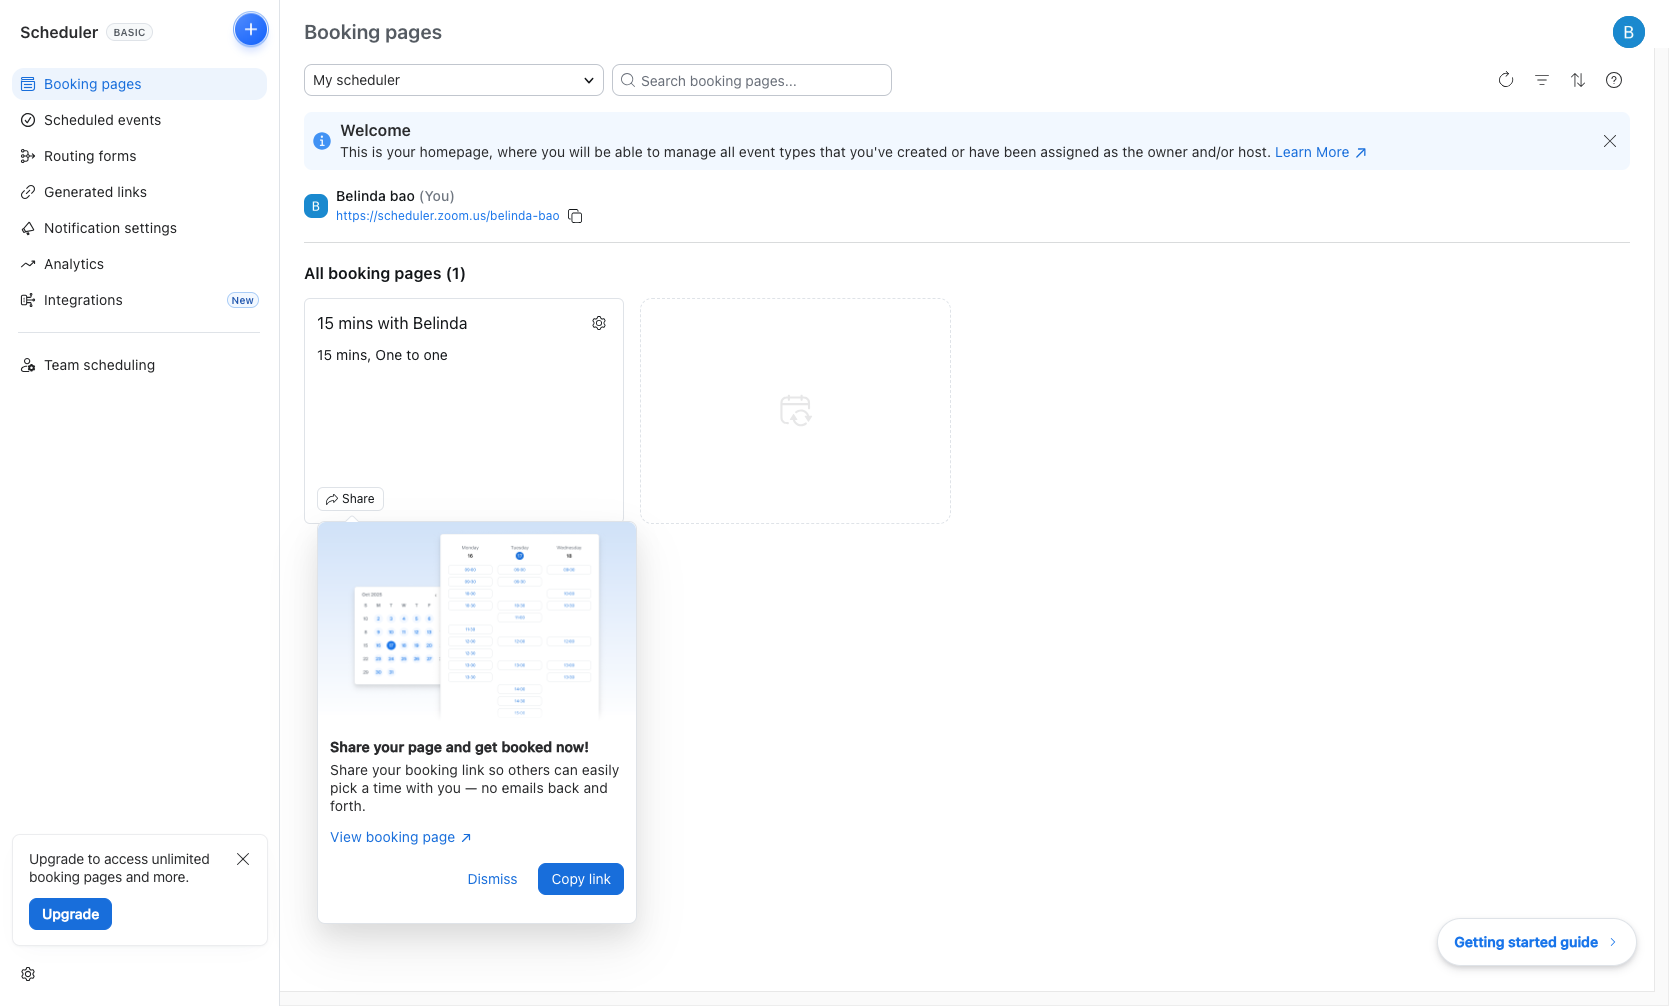
Access Zoom Scheduler
Click the Scheduler menu option
In the left sidebar navigation menu, click Scheduler.

- Step 3 of 6
Create a new booking page
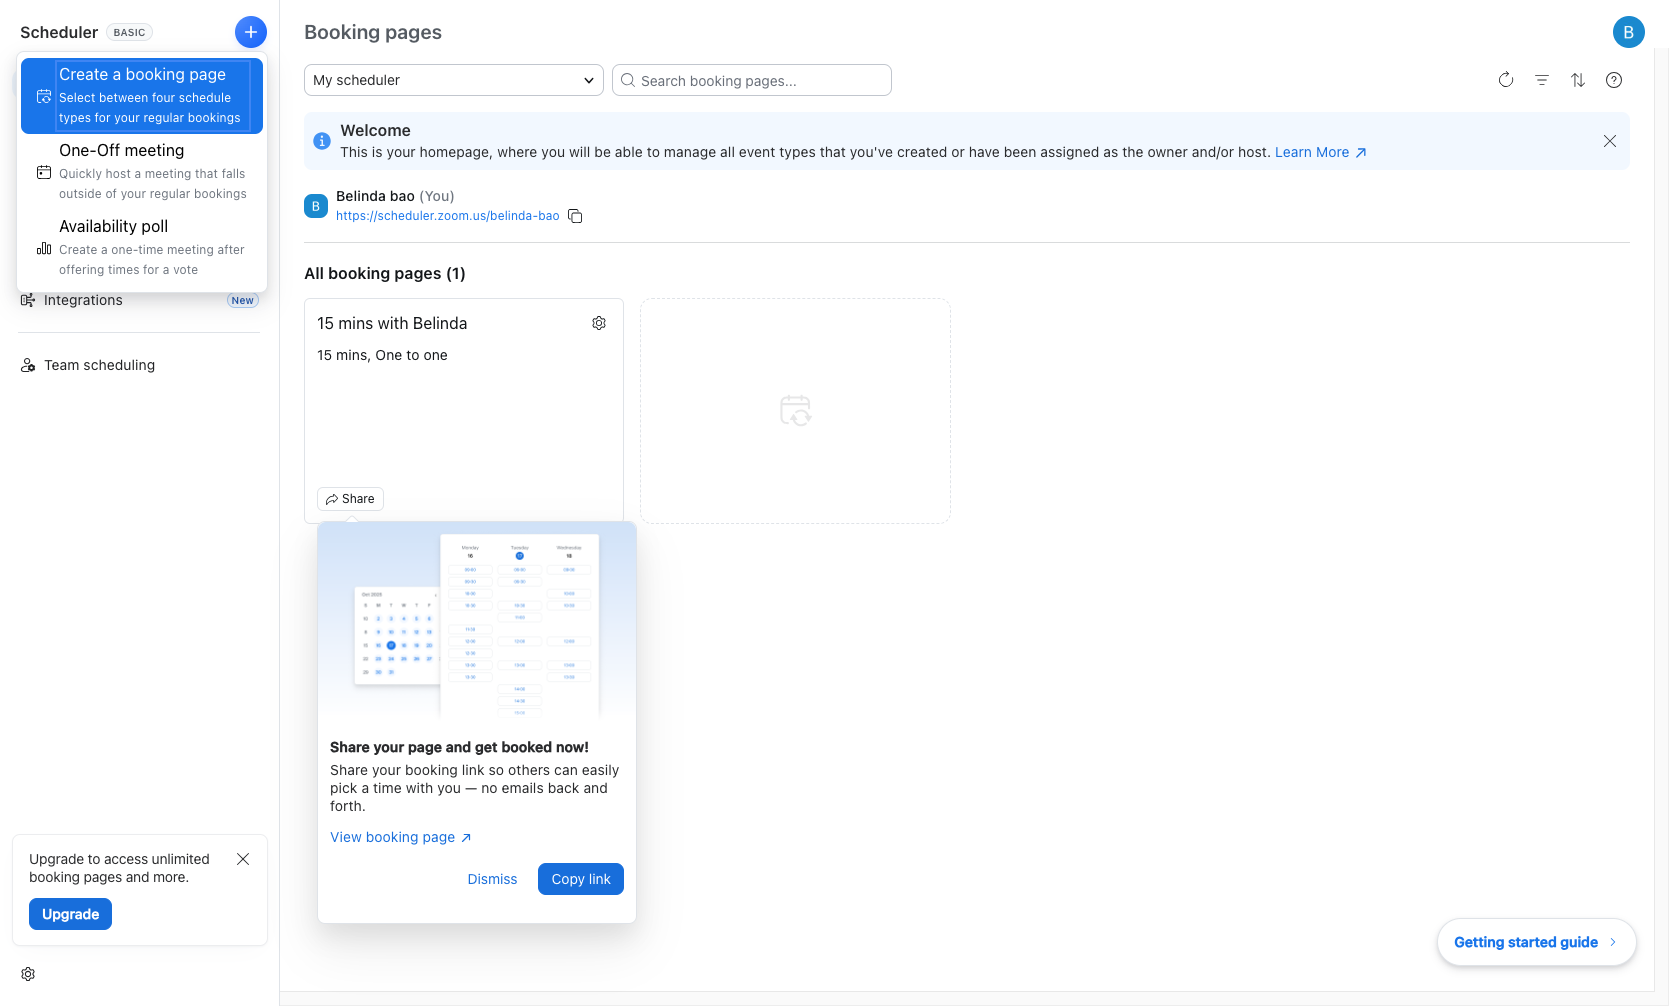
Click the Create button
Click the Create button (plus icon) in the top-left area of the interface.
- Step 4 of 6
Select Create a booking page
Choose the booking page option
From the dropdown menu, click Create a booking page to begin setting up a reusable scheduling page.
- Step 5 of 6
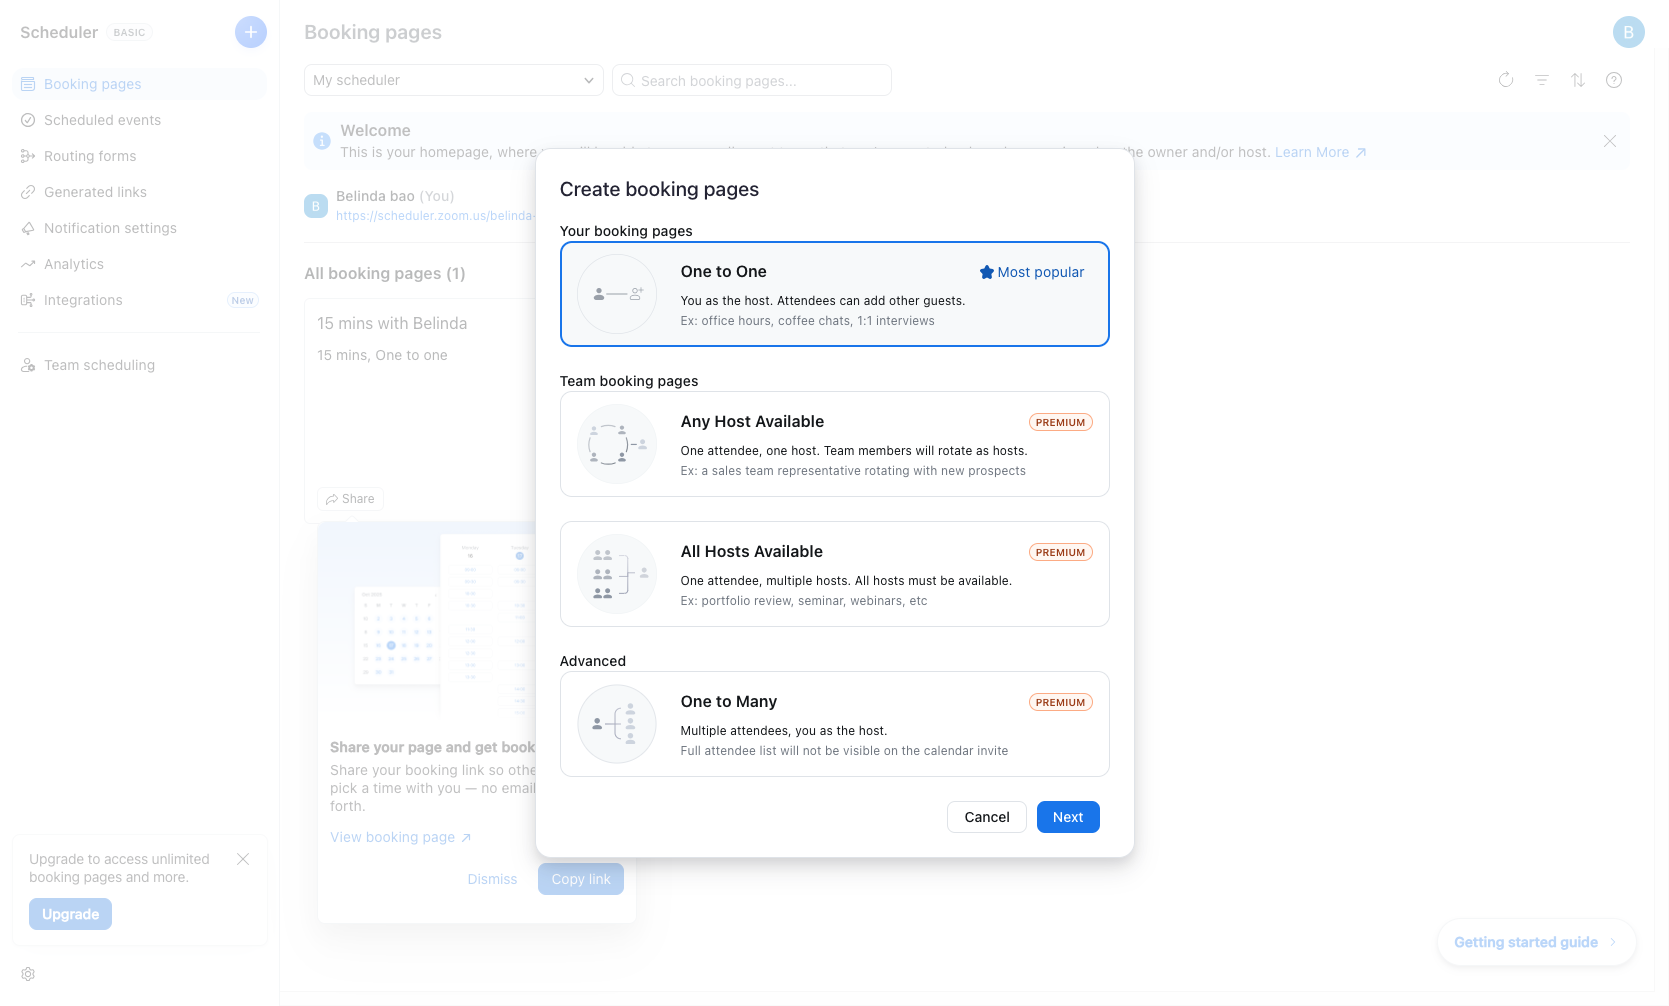
Select appointment type
Choose your booking type
In the Create booking pages dialog, select your preferred appointment type:
- Step 6 of 6
Proceed to configuration
Click the Next button
Click the Next button to continue to the booking page configuration screen.

Verification
After completing the setup, verify your booking page was created successfully:
Return to the Zoom Scheduler dashboard (Booking pages section).
Confirm your new booking page appears in the All booking pages list.
Click View booking page to verify the public-facing page loads correctly.
Use the Copy link button to share your booking URL with others.
Troubleshooting
Cannot create multiple booking pages
If you see the message "Upgrade to create multiple booking pages", your current plan only allows 1 active booking page. Options:
Click Continue creating to replace your existing booking page (your current page will stop accepting new bookings).
Click Upgrade to purchase a premium Scheduler plan that allows multiple booking pages.
Click Cancel to keep your existing booking page unchanged.
Premium features not available
Team booking pages (Any Host Available, All Hosts Available) and One to Many options require a premium Scheduler license. If these options are grayed out or marked as PREMIUM, you will need to upgrade your plan to access these features.
Conclusion
You have successfully initiated the creation of a Zoom Scheduler booking page. Complete the configuration steps (duration, availability, location settings) to finalize your booking page and share the link with attendees.